Modding Guide (Part 1)
Starting at version 2.6.5 the game supports modding in new equipment or replacing existing ones. In this guide I'll show you how it works. If anything isn't clear, or you get stuck somewhere, feel free to ask for help in the Discord.
Step 0: Download the example mod.
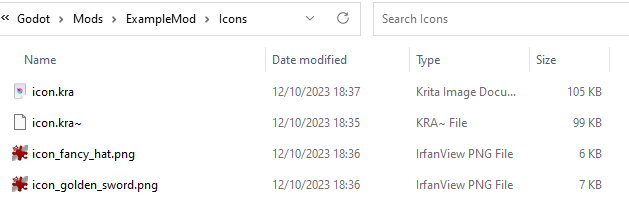
In attachment to this guide, you'll find an example mod. Create a folder name "Mods" in your game folder. It should be next to erodungeons.exe. And extract the contents in there, it should look like this.

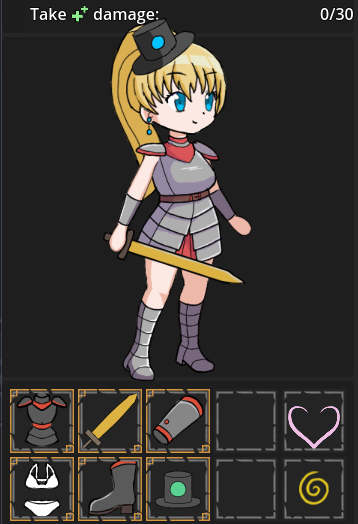
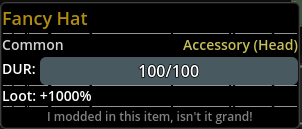
When opening the game you'll notice that the default sword of the warrior has been replaced by a golden Amazing Giga Sword. You can also open the console (Patreon subscribers only) and enter "gear unique_ID" to get a fancy hat. This fancy hat will also show up as loot.

If you're good at reverse engineering this should be enough for you to make your own mods.
Step 1: Create a your mod folder.
The easiest will be to just repurpose the ExampleMod. You'll need to add a Mod folder next to the erodungeons.exe. Inside that folder you create your own mod folder. That's all.
Well, it isn't all since the mod won't do anything of course. But that's what we'll cover right now.
Step 2: Fill in the data for the new equipment.
All data for this game is stored in tab-deliminated txt files. The easiest will be to look at the examples in ExampleMod. To get your data to show up, you need to put such a .txt file in Mods/<ModName>/Data/Wearables. If an item has the same ID as an already existing item, it will overwrite this.
Below are the different parts of the file, and what they mean:
- ID: the unique internal ID used by the game, it is used for console commands. If the ID already exists, it will overwrite the given item.
- icon: indicates the icon of the equipment, see step 3.
- adds: indicates the textures that will be used during combat, see step 3.1. Can be left blank.
- sprite_adds: indicates the textures that will be used on the map, see step 3.2. Can be left blank.
- name: Name of the equipment.
- slot: Slot of the item, outfit-under-weapon-extra. In case of extra you can add arguments to disallow it to overlap other items. Like extra,mouth will make it mutually exclusive with gags. extra,mouth,head will make it incompatible with gags and hairbands.
- DUR: durability of the equipment, should be 0 for weapons.
- requirements: minimum requirements to wear this item. For example class,warrior will limit it to the Warrior class. See step 2.2 for more details.
- script: what the item does. See Step 2.2 for more details.
- goal: if a goal is set, it means the item is cursed and this goal must be fulfilled before the item can be taken off.
- fake: if the item is cursed, it will pretend to be this item until equipped. The ID must be a valid equipment.
- fake_goal: if this goal is filled in, the item will pretend to be the fake until this goal has been completed.
- set: what set this item belongs with, since you can't mod sets yet, you may ignore this.
- rarity: the rarity of the item, ranging from very_common, common, uncommon, rare, very_rare, legendary
- loot: if the item can occur as loot, add loot in this field. If the item can occur as a reward, add reward. If both, add both above eachother.
Step 2.1 (Optional - Advanced): Use Excel to simplify this process.
Filling all this in, in a txt file is quite annoying. Instead you can use an Excel and turn it to a txt file using a macro. As a basis you can use the Excel in the ExampleMod. just overwrite the tables (but not the headings). You can then move to the macro using alt+F11, replace the SaveDirectory with the Data/Wearables folder in your Mod, and then press F5 to run it. You will get a txt file in the correct format in your mod.
You can install Excel by following step 6 of this guide.
Step 2.2 (Optional - Advanced): Look in the project files to see how scripts work.
To see what scripts are valid you can look at the git of the project. Under the Excels folder you can see all valid scripts under Scripts or other gear as inspiration under Gear.
Step 3: Create the icon.
Now in the mod folder, create a folder Icons, in this folder you place your icons. The filename should be of the form <whatever>_<icon name>.png. <icon_name> should be the same as what you put under "icon" in the data files.
Step 3.1 (Optional): Create combat textures.
Under the mod folder, create a folder Textures, then create a folder Puppets, then a folder Human, and then a folder with whatever name you want. That will be the folder where you put the combat textures.

In combat the game uses a 2D skeleton for the combatants. This skeleton consists of different bones. Each of those bones is linked to a several textures. The format of the textures is <whatever>_<texture_ID>,<layer_ID>.png. The texture_ID should be the same as what you put under "adds" in the data files. Look at the project files (step 2.2) or the Krita file in the test project (step 3.3) to see what the layers are.
Additionally you can expand it as <whatever>_<texture_ID>,<layer_ID>-<alt_ID>+<modulate_ID>.png. The alt_ID is primarily used to differentiate between boob sizes, while the modulate_ID allow the texture to be colored as eyecolor, skincolor, haircolor, etc...
Step 3.2 (Optional): Create sprite textures.
Under the Textures folder, create a folder Sprites, then a folder Generic, and then three folders: front, back, and side. These will be the folders where you put the sprite textures, one for each direction.

In combat the game uses three 2D skeletons for map sprites, one for each direction. This skeleton consists of different bones. Each of those bones is linked to a several textures. The format of the textures is <whatever>_<texture_ID>,<layer_ID>.png. The game knows to what direction a texture belongs based on the folder it is in. The texture_ID should be the same as what you put under "adds" in the data files. Look at the project files (step 2.2) or the Krita file in the test project (step 3.3) to see what the layers are.
Step 3.3 (Optional - Advanced): Use Krita to simplify this process.
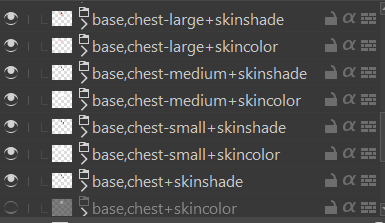
The above may seem a bit daunting if done in a vacuum. However, in the ExampleMod you'll find several .kra files. These are Krita files, and contain the base textures for the game. You can just draw over these textures for your mod. This way you're certain that the textures fit well.
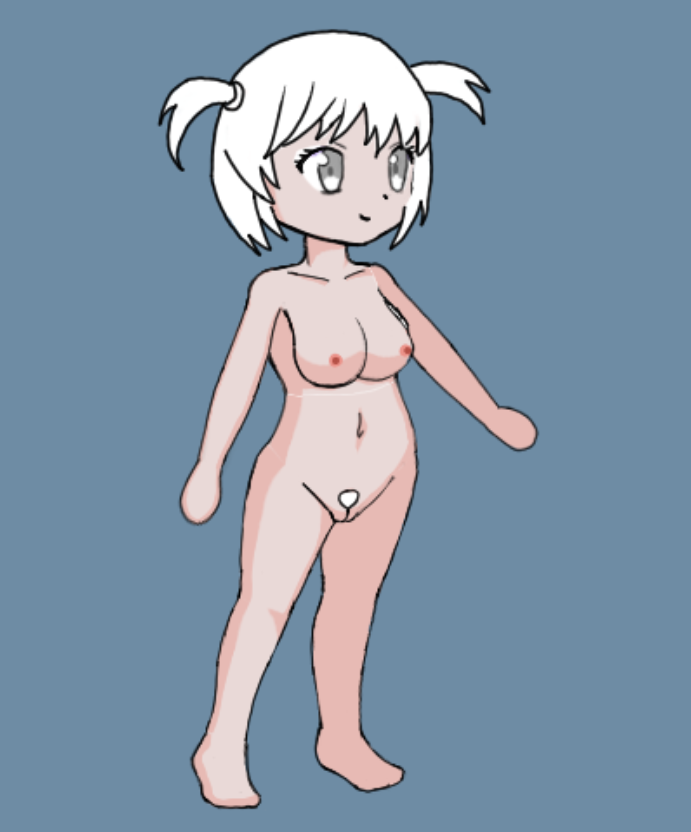
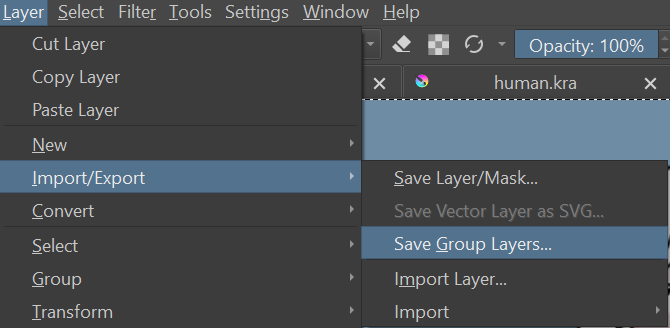
Additionally, if you name your Krita layers in the way <texture_ID>,<layer_ID> you can use the Export Layers feature to export the layers in the correct format for the game (make sure you hide the base layers first), since that's what I do.

Step 4: Check for errors.
The game will automatically check for errors whenever you start it. These are stuff like incorrect scripts, lacking textures, invalid combinations, etc... You can find these errors under the logs of the game. These are stored under %APPDATA%EroDungeons/logs.


First things first. Your log file will start with a couple lines about Godot and your GPU, you can ignore these. It will also end with a warning and error about stuff still in use at exit. This is expected if you didn't close the game by pressing the 'Quit to Desktop' button in the Settings. Here you see a warning about a duplicate ID, which makes sense since we're meant to be overwriting gear.
Step 4.1 (Optional - Advanced): Use Godot 4 to simplify this process.
Instead of running the mod on a game version, you can also run it on the project files itself. Go to the git repo and clone it. Then install the latest version of Godot 4 and point it towards the cloned project. Then put the "Mods"-folder in the same folder as the Godot 4 executable, and run the project in the editor. You'll see the same warnings pop up without having to go to the log files.
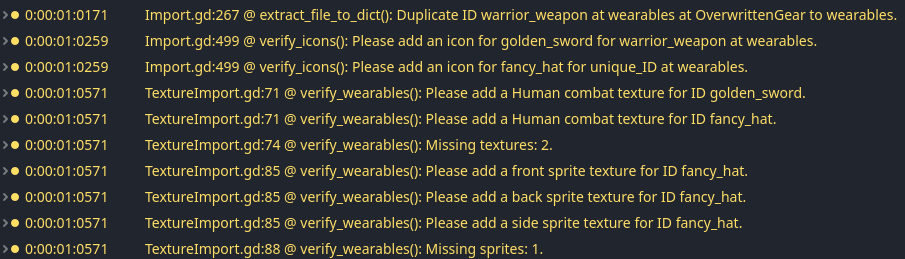
Here for example, the game is warning me that the textures for the icon, the sprites, and the combat texture don't exist.
Step 5: Done.
If you're overwriting gear, you'll see it immediately. If you're adding new gear you're at the mercy of the RNG to have it show up. Unless you've subscribed to the Patreon of course and can use console commands to summon it.
Comments
Log in with itch.io to leave a comment.
could someone make a performance mod to help it run on older computers. i use a toshiba satalite windows 7 laptop and it cant run the game past the loading screen
thats not really something modders do, at least not with games on a small scale such as this one. This would likely require more in depth knowledge about the games code and might not even be possible.
welp it was at least a hope