Modding Guide (for v2.8.2+)
This guide details how to create a mod for Ero Dungeons. The way mods are handled has changed in v2.82, your mod will not be compatible with earlier versions, nor will earlier versions of mods be compatible with post-2.82 game versions.
How to load an existing mod:
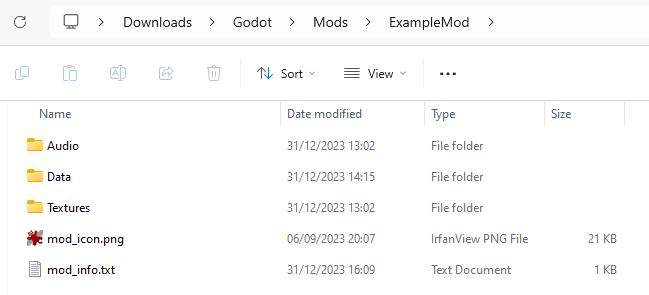
To load a mod, you first have to download it and extract it into your game's mod folder. Normally this is a folder named "Mods" right next to the .exe of the game. Make sure you don't "double folder" it, the path should be Mods/ModName and not Mods/ModName/ModName.
If you did this correctly you'll then find the mod in the Mod Manager (bottom left, next to the settings). Activate the mod here to use it.
Note that on MacOS, the mods should be in ~/Library/Application Support/EroDungeons/Mods instead of next to the executable.

You can find mods in the Mods channel in the Ero Dungeons Discord.
How to create a mod:
To create a mod, you simply click the Create New Mod button on the bottom left of the Mod Manager and give in a valid name. This name will be the name of the mod folder and the mod itself, though you can always change the mod name later.
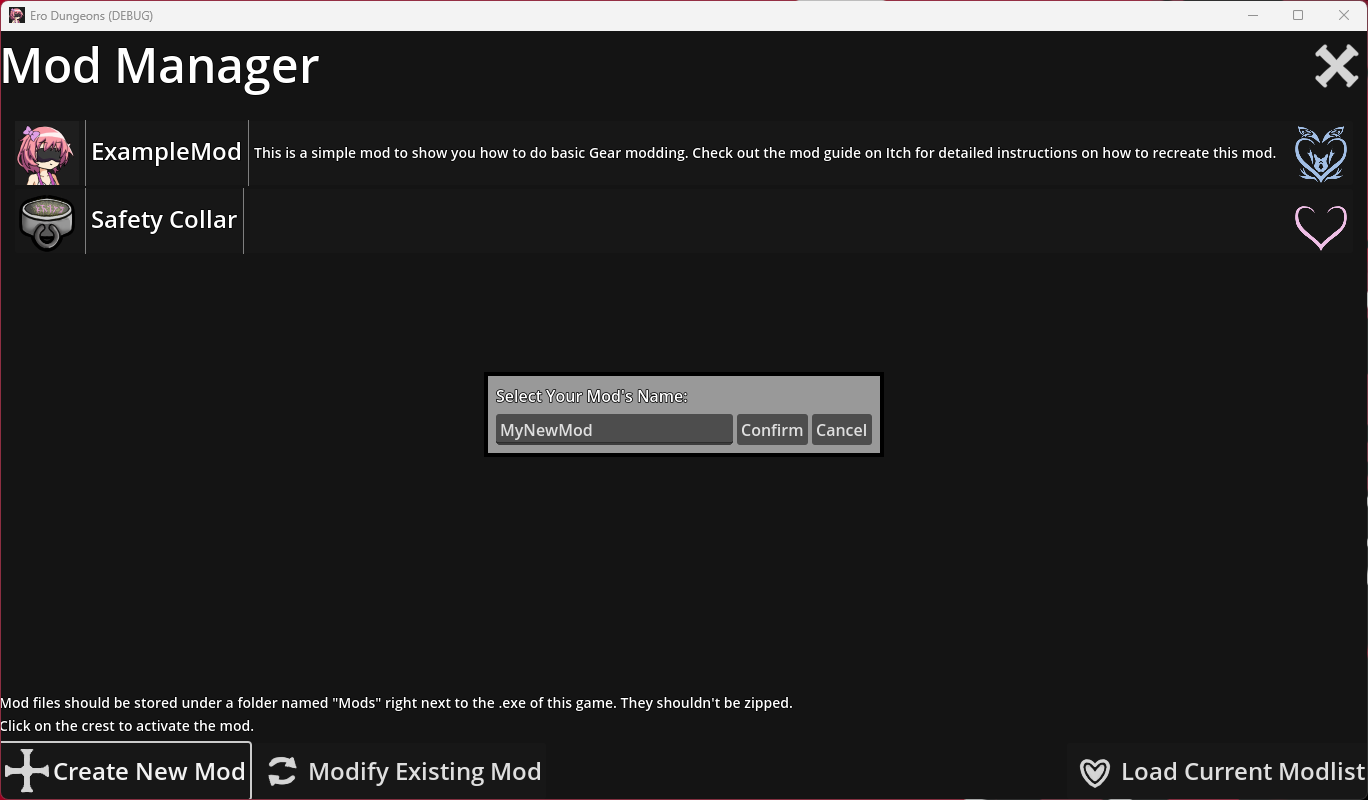
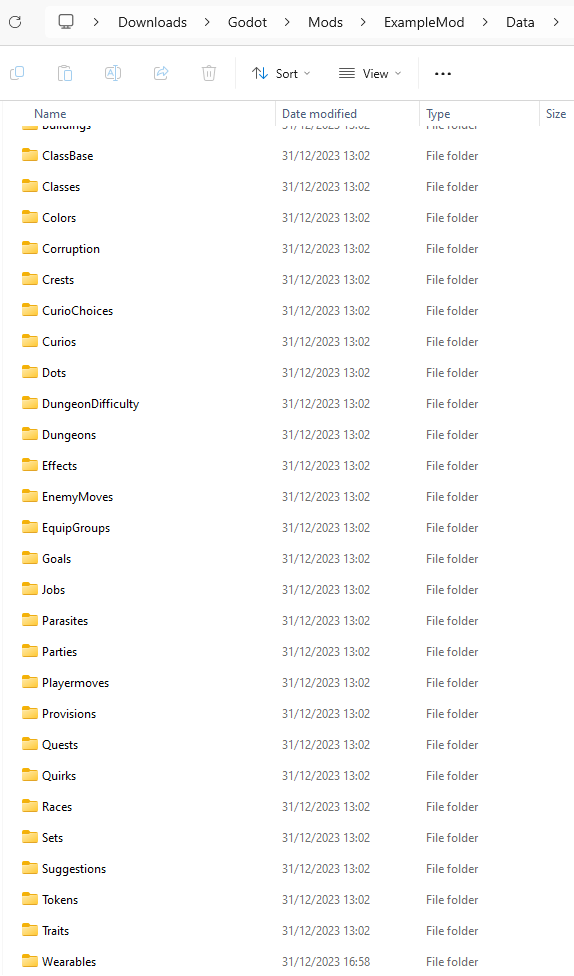
Upon creation, the mod manager will create your mod file and a folder for everything that can be modded. This ensures that you follow the necessary folder structure for the mod to work. You can remove these folders if you don't plan on using them, but I would advise against it.
You can also change the mod name and mod description by modifying the mod_info.txt file directly under the mod folder. The mod_icon.png is the icon that will be shown in the mod manager. You can change it if you want to.

How to modify an existing mod:
To actually start adding data to your mod, click the Modify Existing Mod button and select your mod. You'll be brought to the Importer. At the topright, you can select the view. You start at the Mod view, this is the data included in your mod, it starts empty. The Automod view are the textures included in your mod. The Main view is the data included in the game, this can serve as inspiration of how things work, though modifying it won't do anything. The Auto view are the textures, scenes, and sounds used in the game, you also can't modify these. Finally, the Meta view contains all the verifications for the different data types, it contains which headers are required for each data type and what needs to be included in each field.

As an Example, let's follow the ExampleMod and create a new piece of Equipment. Under Wearables we create a new file to store our data, and add a new line. Each block of the line will contain a hint on what type of data is needed:
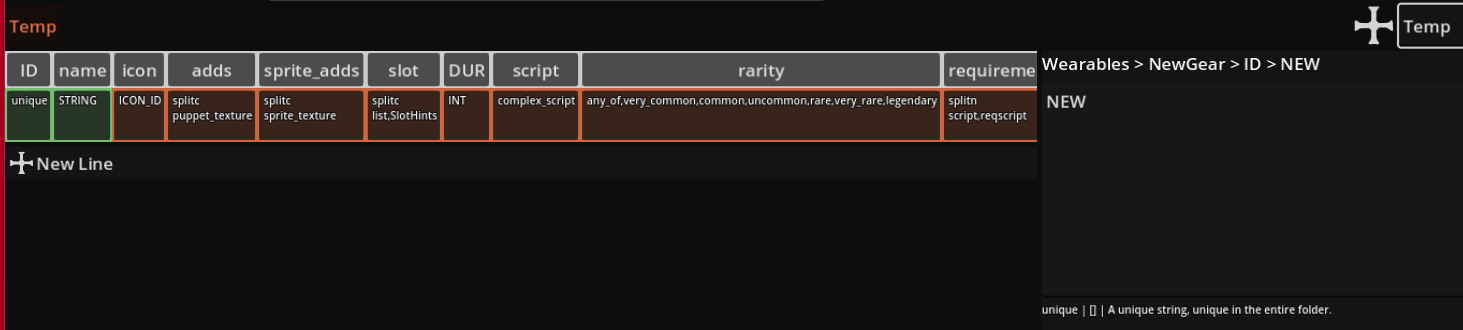
Go through each block and fill in the data. You can use the data under Main as a guideline in case you want to copy something. Most important will be the scripts, you can see how they work in the Scripting Guide, and you can find all types of scripts under Scripts in the Main View.
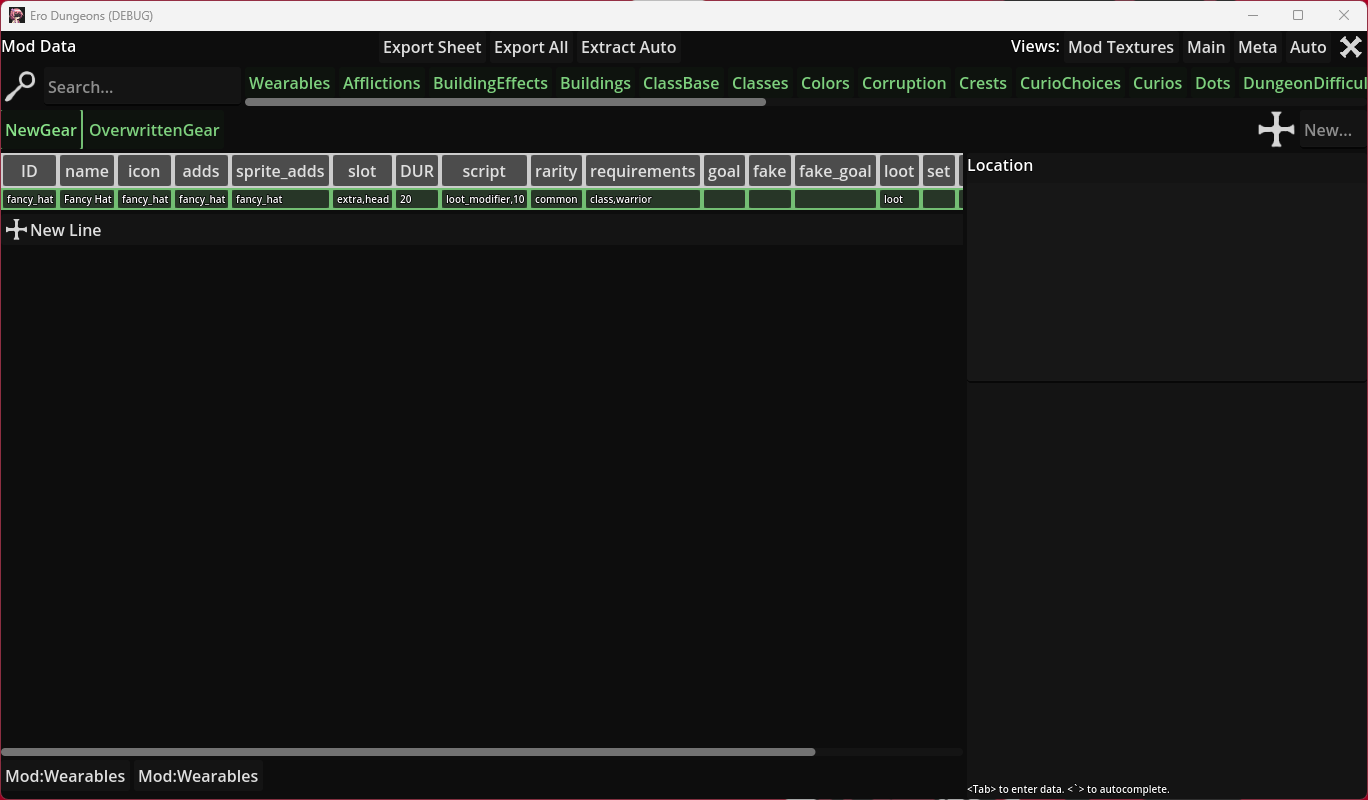
Finally, you can save your mod data to the mod file by pressing either Export Sheet (export the currently viewed grid) or Export All (export all data in the mod). Until then nothing of the mod is saved, so don't forget to press it.
Be aware that if you name an item the same ID as an already existing item, the existing item will be overwritten. This is for example the case with the golden sword in the example mod.
Apart from Wearables, you can add and overwrite all other folders that are visible in the Mod view.
How to mod and add textures:
You can't add textures through the importer, only see which ones are in. To add textures you need to manually put them in their relevant folder. You'll notice if you added them correctly if they show up in the importer and your data is getting verified correctly. Here I'll cover the three most important ones. Also, remember that you need to press the "Extract Auto" button at the top of your mod if you want to reimport your textures if you changed them while changing the data.
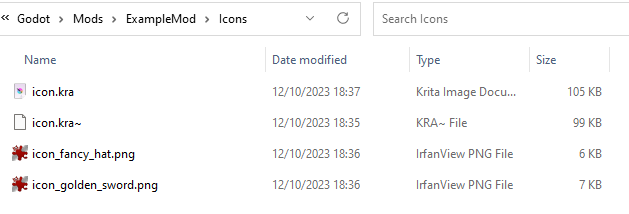
Icon Modding
In the mod folder, under Textures, look for the Icons folder, in this folder you place your icons. The filename should be of the form icon_<icon name>.png. <icon_name> should be the same as what you put under "icon" in the data files.
Puppet Modding
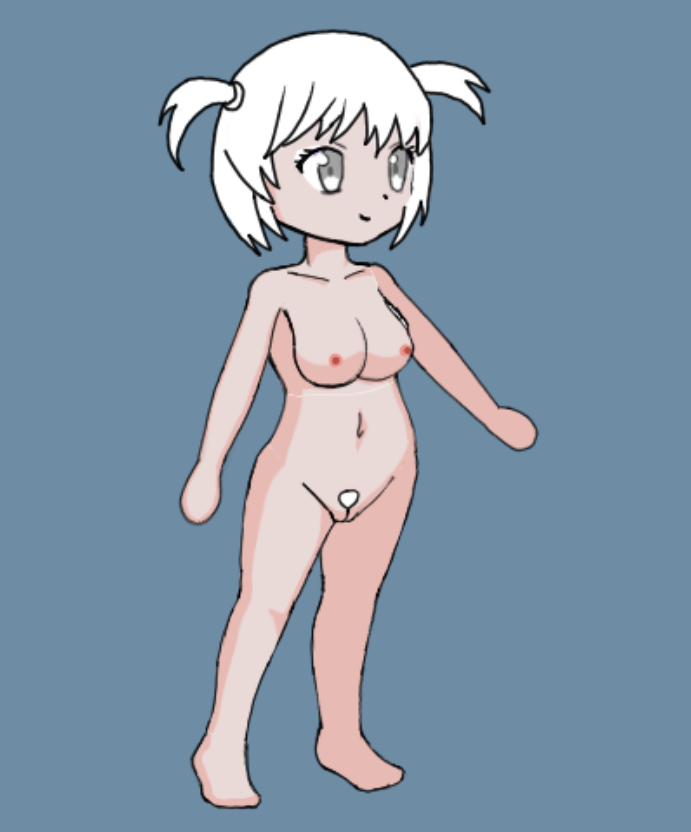
Under the mod folder, under Textures, look for a folder Puppets, then create a folder Human. You can make subfolders if you want. All textures under this folder will be used when drawing Human textures (like all your adventurers). You can make textures for other puppets as well, but they will only work on enemies of course.
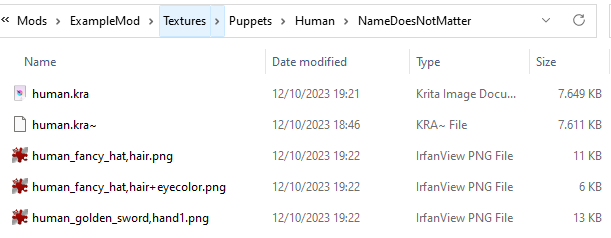
In combat the game uses a 2D skeleton for the combatants. This skeleton consists of different bones. Each of those bones is linked to a several textures. The format of the textures is <whatever>_<texture_ID>,<layer_ID>.png. The texture_ID should be the same as what you put under "adds" in the data files. Look at the project files on git or the Krita file in the example mod to see what the layers are.
Additionally you can expand it as <whatever>_<texture_ID>,<layer_ID>-<alt_ID>+<modulate_ID>.png. The alt_ID is primarily used to differentiate between boob sizes, while the modulate_ID allow the texture to be colored as eyecolor, skincolor, haircolor, etc...
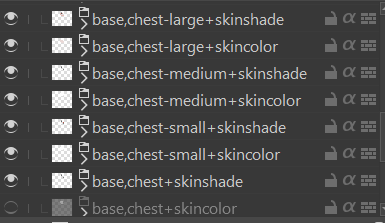
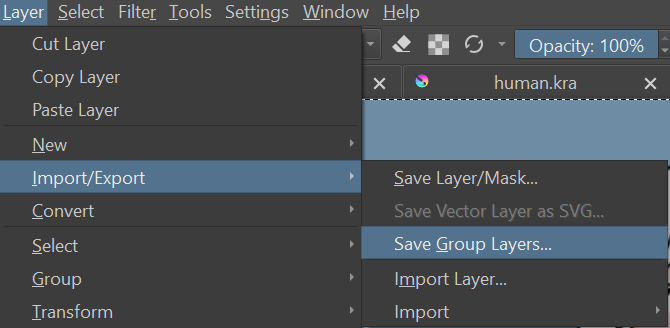
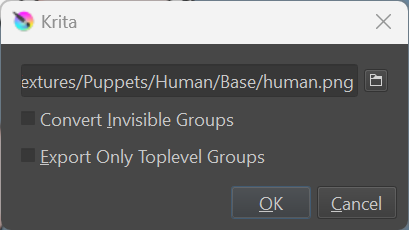
The above may seem a bit daunting. However, in the ExampleMod you'll find several .kra files. These are Krita files, and contain the base textures for the game. You can just draw over these textures for your mod. This way you're certain that the textures fit well.
Additionally, if you name your Krita layers in the way <texture_ID>,<layer_ID> you can use the Export Layers feature to export the layers in the correct format for the game (make sure you hide the base layers first), since that's what I do.
Sprite Modding
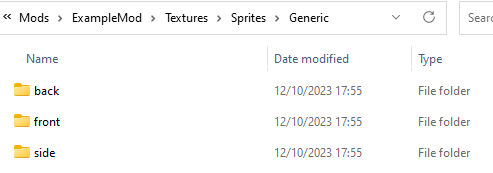
Under the Textures folder, find a folder Sprites, then a folder Generic. Generic is the sprite type for most humanoid overworld sprites, including the adventurers. Inside are three folders: front, back, and side. These will be the folders where you put the sprite textures, one for each direction.
In combat the game uses three 2D skeletons for map sprites, one for each direction. This skeleton consists of different bones. Each of those bones is linked to a several textures. The format of the textures is <whatever>_<texture_ID>,<layer_ID>.png. The game knows to what direction a texture belongs based on the folder it is in. The texture_ID should be the same as what you put under "adds" in the data files. Look at the project files on git or the Krita file in the test project to see what the layers are.
How to share your mod:
If your mod is finished, you can share it in the Mods channel of the Ero Dungeons discord. You can also ask any modding related questions in the modding-discussion channel.
Comments
Log in with itch.io to leave a comment.
why I don't have a export button only verify and save
Mmm, yes. Great information... for PC Users. Where's for the Android ones?
but how do you edit base game data? im trying to make a mod that doesn't add anything but changes gameplay mechanics to make it more forgiving.
i just tried to change the goals on cursed items to remove permanency but i cant get anything to stick.
i wanna do the same thing lmk if u find out how
Kind of a late reply, but you can override it in your own mod. First create your own mod, then locate the item (or moves, scripts, textures, etc). Say you want to override a parasite, locate the parasite in Data Editor, copy the entire row to your own mod, make sure it has the same directory, make sure the ID is still the same, change the column you wish to change, and it should do the trick.
This is an incredible guide for getting people started with modding. Fantastic job on this.